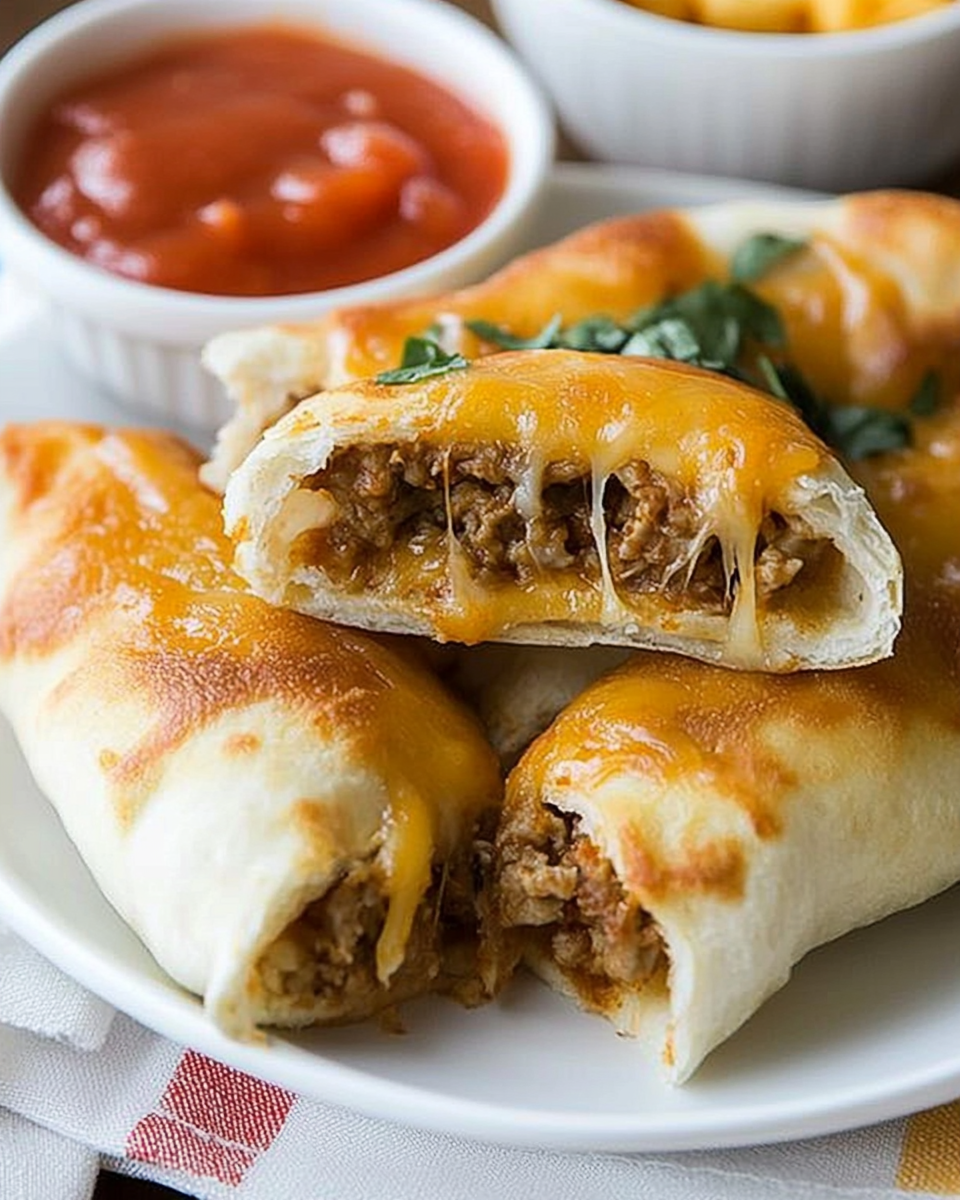
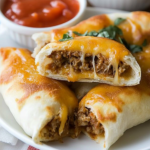
If you’ve ever craved the bold flavor of tacos and the comfort of cheesy breadsticks at the same time, these cheesy taco sticks are the answer. Packed with seasoned ground beef and gooey melted Colby Jack cheese, all wrapped in golden pizza dough and brushed with garlic butter, they’re a handheld snack that checks all the boxes. Perfect for busy weeknights, casual parties, or game-day spreads, this recipe delivers bold taste with simple ingredients.
Whether you’re feeding hungry kids, prepping a potluck appetizer, or just want a fun twist on taco night, these cheesy taco sticks are a go-to. They’re easy to make, quick to bake, and completely customizable based on your favorite fillings.
Why You’ll Love Cheesy Taco Sticks
These cheesy, savory snacks offer convenience and flavor in one neat package. Here’s what makes them a must-try:
- Quick and Easy: From start to finish in under 30 minutes
- Family-Friendly: Loved by both kids and adults
- Versatile: Great for snacks, dinners, or appetizers
- Customizable: Use your favorite meats, cheeses, or add-ins
- Make-Ahead Friendly: Prepare and freeze for later
They’re especially great for on-the-go meals or lunchboxes, and they reheat well without losing their texture or flavor.
Tools and Equipment You’ll Need
To make cheesy taco sticks, you don’t need any fancy kitchen gadgets. Just a few basics:
- Skillet – for browning and seasoning the beef
- Baking sheets (2) – large enough to hold 6 sticks each
- Parchment paper – to prevent sticking and aid in cleanup
- Pastry brush – for applying the garlic butter topping
- Knife or dough cutter – to evenly divide the dough into squares
- Small bowl – for mixing garlic butter
Why Each Tool Matters
- Skillet: Ensures even cooking and browning of the meat
- Parchment Paper: Prevents sticking and burning
- Pastry Brush: Distributes butter evenly for golden tops
- Sharp Knife: Ensures precise cuts for consistent baking
Pro Prep Tips
Here are a few preparation tips to make sure your cheesy taco sticks turn out perfectly:
- Keep pizza dough refrigerated until you’re ready to use it. Warm dough becomes stretchy and harder to work with.
- Avoid overstuffing each square. Too much filling can cause the dough to burst open during baking.
- Seal the dough tightly to prevent cheese from leaking out.
- Use string cheese or cheese sticks for consistent melting inside each taco stick.
- For a crispier finish, bake directly on the baking sheet for the last 2 minutes without parchment.
Ingredients List
Make sure everything is measured and ready before starting. This helps the process move smoothly.
Main Ingredients
- 1 pound lean ground beef
- 1 teaspoon minced garlic
- 1 package taco seasoning (plus water as directed on the package)
- 2 cans refrigerated pizza dough
- 12 Colby Jack cheese sticks (or mozzarella as a substitute)
Garlic Butter Topping
- ¼ cup unsalted butter
- 1 teaspoon garlic powder
- 1 teaspoon dried parsley
Step-by-Step Instructions
Follow these steps to create your golden, cheesy taco sticks:
- Preheat your oven to 425°F. Line two baking sheets with parchment paper.
- Cook the beef: In a skillet over medium-high heat, brown the ground beef for 5–7 minutes. Drain excess fat.
- Add flavor: Stir in minced garlic, taco seasoning, and water. Cook over high heat for 2–3 minutes, until the water has evaporated. Set aside.
- Prepare the dough: Roll out one can of pizza dough into a 12×8-inch rectangle. Cut into six 4×4-inch squares. Repeat with the second can for 12 total squares.
- Assemble: Add 3 tablespoons of beef mixture to the center of each square. Cut cheese sticks in half and place one half on top of the meat.
- Fold and seal: Fold dough over the filling, pinch all edges tightly, and place seam-side down on the baking sheet.
- Make garlic butter: Melt butter and mix with garlic powder and dried parsley.
- Brush tops: Use a pastry brush to coat each stick with the garlic butter mixture.
- Bake for 12–14 minutes, or until golden brown and puffed.
- Cool slightly before serving.
Serving Suggestions for Cheesy Taco Sticks
These cheesy taco sticks are best served warm, straight from the oven, when the cheese inside is still melty and the crust is perfectly crisp. Here are a few ways to take your serving presentation to the next level:
Dipping Sauces
Pairing them with bold, creamy, or tangy dips makes them even more irresistible.
- Sour cream – a classic, cool contrast to the warm, seasoned beef
- Salsa – choose mild, medium, or spicy depending on your preference
- Guacamole – adds richness and freshness
- Queso blanco – for extra cheesiness
- Spicy ranch or chipotle mayo – for a creamy kick
Plating Tips
- Serve them in a basket lined with parchment for a casual vibe
- Slice each taco stick in half on the diagonal for a party platter
- Add fresh garnishes like chopped cilantro, diced tomatoes, or shredded lettuce for color and texture
Meal Ideas
While cheesy taco sticks are great on their own, they also fit seamlessly into a themed dinner or potluck spread:
- Add them to a Tex-Mex appetizer tray
- Pair with a fresh salad and Mexican rice for a full meal
- Use leftovers in lunchboxes or wrap them in foil for an on-the-go snack
Common Mistakes to Avoid
Even though the recipe is simple, there are a few common pitfalls to avoid to ensure your cheesy taco sticks bake up perfectly every time.
1. Overfilling the Dough
Adding too much beef or cheese can cause the dough to split during baking. Stick to about 3 tablespoons of filling and half a cheese stick for best results.
2. Not Sealing the Edges Properly
If the dough isn’t pinched closed firmly, the filling can ooze out while baking. Make sure you seal both the sides and the ends securely.
3. Using Warm Dough
Warm dough becomes sticky and hard to shape. Keep the pizza dough refrigerated until you’re ready to use it.
4. Underbaking
If you take the sticks out too soon, the center may be doughy. Bake until the tops are deep golden brown and puffed up.
5. Skipping the Butter Topping
The garlic butter adds flavor and enhances the golden crust. Don’t skip this step—it makes a big difference in taste and presentation.
How to Perfect Your Cheesy Taco Sticks
Use the Right Cheese
Colby Jack melts well and offers a balanced flavor, but you can experiment with mozzarella for a stretchier texture or pepper jack for heat.
Chill Before Baking
After assembling the taco sticks, refrigerate them for 10 minutes to help them hold their shape in the oven.
Add Extra Flavor
Consider seasoning the beef with chopped onions, green chiles, or even a splash of lime juice for added dimension.
Double the Garlic Butter
If you love flavor, make extra garlic butter and brush the sticks again right after baking for even more richness.
Best Side Dishes for Cheesy Taco Sticks
If you’re serving cheesy taco sticks as part of a meal, round them out with a few complementary sides. These eight dishes enhance both the flavor and the visual appeal of your spread.
1. Mexican Street Corn (Elote)
Creamy, tangy, and spicy, elote pairs beautifully with the richness of the taco sticks.
2. Cilantro Lime Rice
A light, zesty side that adds freshness and cuts through the cheese and beef.
3. Refried Beans
Hearty and comforting, beans complete the Tex-Mex experience.
4. Black Bean and Corn Salad
Cool and crunchy, this salad adds color and balance to the plate.
5. Nachos with Queso
If you’re going all-in on cheese, crispy nachos with warm queso dip make a fun addition.
6. Southwest Slaw
A crunchy slaw with lime dressing offers contrast to the soft dough and savory filling.
7. Tortilla Chips with Salsa Trio
Offer a variety of salsas—pico de gallo, roasted tomato, and green tomatillo—for dipping and variety.
8. Churro Bites
For a sweet finish, serve these warm cinnamon-sugar treats to complement the savory flavors.
Pro Tips for the Best Cheesy Taco Sticks
Whether you’re making them for the first time or looking to improve your technique, the following tips will help you perfect every batch.
Use Pre-Shredded Cheese as a Substitute
If you don’t have cheese sticks, pre-shredded Colby Jack works just as well. Use about 2 tablespoons per taco stick, placed on top of the taco meat before sealing the dough.
Add Extra Spice or Flavor
For more heat, add diced jalapeños, hot sauce, or a spicy taco seasoning blend. For added depth, mix a bit of chopped onion or green pepper into the beef while browning.
Make Them Vegetarian
Swap out the ground beef for black beans, lentils, or a plant-based meat alternative. You’ll still get the same texture and seasoning without the meat.
Cool Before Storing
Let the taco sticks cool for at least 10 minutes before packing them for storage. This prevents condensation, which can make the dough soggy.
Brush with Butter Twice
Once before baking and once immediately after removing them from the oven. This second brushing adds flavor and keeps the tops soft and flavorful.
How to Store and Reheat Cheesy Taco Sticks
Because these taco sticks reheat beautifully, they’re perfect for meal prep, lunchboxes, or snacking later in the week.
Storing in the Refrigerator
Place cooled cheesy taco sticks in an airtight container. Store in the refrigerator for up to 4 days. To avoid sogginess, separate layers with parchment paper if stacking.
Freezing Instructions
To freeze, place the cooled taco sticks on a baking sheet and freeze individually for 1 hour. Then transfer to a freezer-safe bag or container. They will last up to 2 months.
You can also freeze them unbaked. Just assemble the sticks, place them on a baking sheet, and freeze. Once frozen, transfer to a freezer bag. When ready to bake, add a few extra minutes to the baking time without thawing.
Reheating Methods
- Oven: Preheat to 350°F and bake for 8–10 minutes or until warmed through
- Air Fryer: Heat at 350°F for 5–6 minutes for a crispier exterior
- Microwave: Heat for 45–60 seconds (soft texture, not as crispy)
The oven and air fryer options are best if you want to restore the original texture of the golden crust.
Frequently Asked Questions (FAQs)
What other cheeses can I use besides Colby Jack?
Mozzarella, cheddar, Monterey Jack, or pepper jack are all excellent choices. Use what you have on hand or mix them for extra flavor.
Can I use crescent roll dough instead of pizza dough?
Yes. Crescent dough makes a flakier, more buttery crust. Just be gentle when sealing the edges to keep the filling inside during baking.
Can I make these taco sticks ahead of time?
Definitely. Assemble them and refrigerate up to 24 hours before baking. You can also freeze them unbaked and cook straight from the freezer when needed.
How do I keep the cheese from leaking out during baking?
Make sure to seal all edges tightly and don’t overstuff. A light egg wash around the seams can help with sealing if your dough is warm or sticky.
Are these good for kids?
Absolutely. They’re the perfect size for little hands and mild in flavor. You can leave out the taco seasoning or use a low-sodium version if needed.
Can I make these in bulk for a party?
Yes. This recipe scales up easily. Make multiple batches ahead of time and keep them warm in the oven until serving.
What dipping sauces go best with them?
Salsa, sour cream, guacamole, and queso are top choices. For a twist, try creamy cilantro dressing or chipotle mayo.
Final Thoughts
Cheesy taco sticks are one of those recipes that feel like a cheat code for weeknight dinners and casual entertaining. They offer the flavor and satisfaction of a taco with the portability of a snack. Whether you’re feeding a family, prepping for a party, or just need something comforting and quick, this recipe delivers every time.
Keep them stocked in your freezer, customize the filling to fit your cravings, and experiment with dips and sides to make them your own. Once you try them, you’ll see why these taco sticks earn a permanent spot in your meal rotation.
Cheesy Taco Sticks
Ingredients
- 1 pound lean ground beef
- 1 teaspoon minced garlic
- 1 package taco seasoning plus water as directed on the package
- 2 cans Pillsbury pizza dough
- 12 Colby Jack cheese sticks
- ¼ cup unsalted butter
- 1 teaspoon garlic powder
- 1 teaspoon dried parsley
Instructions
- Preheat oven to 425°F. Line two baking sheets with parchment paper. Keep the pizza dough refrigerated until ready to use.
- In a skillet over medium-high heat, cook the ground beef for 5–7 minutes until browned. Drain excess fat.
- Add minced garlic, taco seasoning, and water as directed on the seasoning package. Cook for 2–3 minutes over high heat until water has evaporated. Remove from heat.
- Unroll one can of pizza dough onto a baking sheet and shape into a 12×8-inch rectangle. Cut into six 4×4-inch squares. Repeat with the second can to make 12 total squares.
- Add about 3 tablespoons of the taco meat to the center of each dough square.
- Cut each cheese stick in half and place one half on top of the meat.
- Fold the sides of the dough over the filling and pinch to seal. Fold and seal the ends, placing each stick seam-side down on the baking sheet. Avoid overstretching the dough.
- Melt butter and mix in garlic powder and dried parsley. Brush the tops of the taco sticks with the butter mixture.
- Bake for 12–14 minutes or until golden brown and puffed.
- Let cool slightly before serving.
Leave a Comment