This rich, creamy, and elegant dessert requires only two ingredients but delivers a luxurious chocolate experience reminiscent of classic French mousse.
Why You’ll Love This Recipe
If you’re looking for a quick, decadent dessert that fits a plant-based lifestyle, this easy 2-ingredient vegan chocolate mousse checks every box. It’s silky, light, and has a deep chocolate flavor without the need for cream, eggs, or complex steps. Inspired by chocolate chantilly, a French classic made by whipping chocolate and water over an ice bath, this recipe reimagines indulgence in its simplest form.
You’ll love this recipe because:
- It’s dairy-free, egg-free, and gluten-free
- Requires just two pantry ingredients
- Can be made in under 10 minutes
- Ideal for entertaining, everyday treats, or elegant dinners
- Easily customized with toppings like orange zest, sea salt, or berries
This mousse is perfect for those craving something rich without heavy preparation. Whether you’re hosting or simply treating yourself, this minimalist dessert won’t disappoint.
Preparation Phase and Tools to Use
Essential Tools and Equipment
To make this vegan chocolate mousse, gather the following tools:
- 2 medium mixing bowls – One for melting the chocolate, one for the ice bath
- Whisk or electric hand mixer – To whip the chocolate mixture into a fluffy texture
- Large bowl with ice water – Serves as an ice bath to cool the chocolate quickly
- Spatula – For folding and stirring
- Serving bowls or dessert cups – For presentation and storage
Importance of Each Tool
- The ice bath is critical for setting the mousse properly and quickly.
- A whisk or hand mixer introduces air into the chocolate mixture, creating that signature airy texture.
- A rubber spatula helps maintain the texture when transferring or folding the mousse.
Preparation Tips
Before starting, make sure your tools and ingredients are prepped and ready. Timing is important for the mousse to whip correctly.
- Use high-quality dark chocolate—at least 70% cocoa—for rich flavor and proper consistency.
- Make sure the chocolate is labeled vegan or dairy-free to ensure the recipe remains plant-based.
- You can use decaf coffee or herbal tea for a caffeine-free alternative.
- Don’t skip the ice bath—it’s essential for whipping the mousse to the right texture.
Ingredients
| Ingredient | Quantity |
|---|---|
| Dark chocolate (70% cocoa or more, dairy-free) | 2 cups, broken into small pieces |
| Hot coffee or tea (decaf optional) | 1 cup |
This minimal ingredient list highlights the importance of using quality chocolate, since it’s the star of the dish. Choose a bold dark chocolate that melts smoothly and has minimal additives.
Step-by-Step Directions
Follow these clear, concise steps to create the perfect easy 2-ingredient vegan chocolate mousse.
- Prepare the ice bath:
Fill a medium bowl with cold water and ice. Set aside. - Melt the chocolate:
Place the chocolate pieces in a second medium bowl.
Pour the hot coffee or tea over the chocolate.
Stir gently until fully melted and smooth. - Whip the mixture:
Place the bowl of melted chocolate over the ice bath.
Whisk vigorously by hand or with an electric hand mixer for about 5 minutes.
Continue until the mixture begins to thicken noticeably. - Reach mousse texture:
Once thickened, remove the bowl from the ice bath.
Continue whisking for another minute or two until the mousse becomes fluffy and light. - Serve:
Spoon the mousse into individual serving cups or dessert bowls.
Serve immediately for a soft mousse, or refrigerate for 30 minutes for a firmer texture.
Tips and Variations
Customize this vegan chocolate mousse to suit your preferences:
- Add a dash of vanilla extract or a pinch of sea salt to enhance flavor
- Stir in orange zest for a citrus note
- Use chai tea instead of coffee for a spiced version
- Top with berries, coconut flakes, or shaved chocolate for extra texture and contrast
- Add 1 tablespoon of maple syrup if you prefer a slightly sweeter mousse
Serving Suggestions
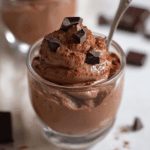
The texture of this mousse is airy and smooth, making it a great base for creative toppings or elegant presentation. Here are several ways to serve it:
- Glass cups or ramekins: Display the mousse in clear glass to highlight its texture and color.
- Chilled dessert bowls: If you’re prepping in advance, serve it chilled in porcelain or ceramic dishes.
- Layered parfait-style: Alternate mousse with vegan whipped cream or fruit compote for a layered dessert.
Top with Simple Enhancements
- Fresh berries – Raspberries, blueberries, or strawberries add a tart contrast to the deep chocolate flavor.
- Shaved dark chocolate – Boosts the richness while adding a bit of texture.
- Candied orange peel – Complements the chocolate with a bitter-sweet citrus note.
- Sea salt flakes – Enhances the flavor complexity.
- Toasted coconut – Adds a bit of crunch and a tropical note.
- Vegan whipped cream – Softens the intensity for those who prefer lighter chocolate flavors.
Serving your easy 2-ingredient vegan chocolate mousse with thoughtful presentation and garnishes can transform it into a refined dessert fit for any occasion.
Common Mistakes to Avoid
This mousse may be minimal in ingredients, but the technique plays a crucial role in its success. Here are common pitfalls and how to prevent them:
1. Using Low-Quality Chocolate
The entire flavor and texture of this dessert rely on chocolate. Avoid chocolate chips or low-cocoa varieties. Use dark chocolate that’s 70% cocoa or higher and certified dairy-free for optimal results.
2. Skipping the Ice Bath
The ice bath is not optional. It’s essential to the mousse-setting process. Without it, the chocolate may not emulsify correctly, resulting in a thin or separated mixture.
3. Over-Whipping the Mixture
Whipping too long can break the emulsion and create a grainy texture. As soon as the mousse thickens and forms soft peaks, stop whisking.
4. Not Whipping Enough
Under-whipping leads to a runny mousse that won’t hold its shape. Be consistent and vigorous with your whisking for at least 4 to 5 minutes until it begins to thicken.
5. Adding Too Much Liquid
Stick to the 2:1 chocolate-to-liquid ratio. Excess liquid prevents the mousse from setting properly and can cause separation.
6. Serving Too Warm
Allow the mousse to chill if you’re not serving it immediately. A slightly cooled mousse holds shape better and delivers the intended texture.
Side Dish Recommendations
While this mousse is indulgent on its own, it pairs well with light and refreshing side dishes. Here are eight suggestions to complement its richness:
1. Fresh Berry Salad
A medley of strawberries, blackberries, and mint with a splash of lemon juice helps cut through the mousse’s intensity.
2. Citrus Sorbet
Lemon, grapefruit, or blood orange sorbet offers a cold, tangy contrast to the creamy mousse.
3. Coconut Yogurt Parfait
Layer unsweetened coconut yogurt with granola and fruit beside a small serving of mousse for a complete dessert trio.
4. Chilled Espresso or Decaf Coffee
A small shot of espresso or cold brew enhances the mousse’s chocolate depth.
5. Almond Biscotti
Crunchy and lightly sweet, almond biscotti are perfect for dipping or serving on the side.
6. Spiced Poached Pears
Serve warm or chilled. The subtle sweetness and spice pair elegantly with chocolate.
7. Vegan Shortbread Cookies
Simple, buttery (but dairy-free), and crisp—these cookies provide a nice texture contrast.
8. Herbal Tea Infusion
A cup of chamomile, mint, or hibiscus tea balances the dessert with floral or earthy tones.
Recipe Tips for Success
This recipe might be minimalist, but it benefits from thoughtful execution. These expert tips will help you achieve the ideal mousse texture every time.
Use the Right Chocolate
Choose a high-quality, dairy-free dark chocolate with at least 70% cocoa. The cocoa solids create structure and flavor, which are essential to the mousse’s success. Avoid overly processed or overly sweet chocolate.
Don’t Skip the Ice Bath
This step is non-negotiable. The cold environment quickly cools the mixture, allowing the chocolate to emulsify and trap air as it’s whipped. This creates the light, airy texture mousse is known for.
Whisk Vigorously
A hand mixer will speed things up, but whisking by hand is also effective. Aim for consistent, rapid movement. Stop as soon as the mousse forms soft peaks. Over-whipping can break the emulsion and cause a grainy result.
Customize Thoughtfully
Add subtle enhancements like a splash of vanilla extract, a pinch of cinnamon, or a teaspoon of liqueur for depth. These additions shouldn’t overpower the core flavor—just elevate it.
Adjust Texture
If the mousse sets too firmly after chilling, let it sit at room temperature for 10 minutes before serving. For a looser texture, use slightly less chocolate.
Storage and Reheating Instructions
Proper storage extends the life of your easy 2-ingredient vegan chocolate mousse and preserves its ideal texture.
Refrigeration
- Store the mousse in an airtight container or tightly covered dessert bowls.
- It will stay fresh in the refrigerator for up to 4 days.
- The texture may firm up slightly, which is normal. Let it sit for a few minutes before serving to soften.
Freezing
- Freezing is not recommended. The mousse may become icy or grainy after thawing.
- If you must freeze it, stir gently once thawed to try and restore smoothness, though texture changes are likely.
Reheating
- This dessert is intended to be served cold or at room temperature.
- Do not reheat it, as warming will melt the mousse and ruin its whipped structure.
Frequently Asked Questions (FAQs)
These are the most common questions asked by home cooks preparing this vegan chocolate mousse recipe.
Can I use a different type of chocolate?
Yes. You can use semisweet or bittersweet chocolate as long as it is dairy-free and 70% cocoa or higher. Lower cocoa content can result in a mousse that is too soft or overly sweet.
What can I substitute for coffee?
Use black or herbal tea, such as rooibos or chamomile, or even plain hot water with a splash of vanilla extract. Avoid liquids with added sugar or milk.
Can I make this ahead of time?
Absolutely. Make the mousse a day or two in advance and store it in the fridge. Cover tightly to prevent it from drying out. Stir gently before serving if needed.
How will I know when the mousse is done whipping?
The mousse is ready when it holds soft peaks and has a thick, yet fluffy consistency. If it becomes too stiff, it has likely been over-whipped.
Is this recipe safe for kids?
Yes, especially if you use decaf coffee or a caffeine-free tea. The recipe contains no raw eggs or dairy, making it safe and allergen-friendly.
Can I add sweetener?
If your chocolate is very bitter, you can add a small amount of maple syrup or agave before whipping. This must be done before the mousse cools, or it may not incorporate smoothly.
Conclusion
The beauty of this easy 2-ingredient vegan chocolate mousse lies in its simplicity. With just dark chocolate and hot coffee or tea, you can create a dessert that feels luxurious and indulgent, yet remains dairy-free, egg-free, and gluten-free.
Whether you’re making it for yourself, your family, or guests, it’s a foolproof recipe that delivers maximum flavor with minimal effort. When paired with smart storage, thoughtful toppings, and a few simple techniques, this mousse can easily become your go-to dessert for any occasion.
Try it once, and you’ll understand how two simple ingredients can transform into a show-stopping finish to any meal.
Easy 2-Ingredient Chocolate Mousse
Ingredients
- 2 cups dark chocolate 70% cocoa or more, broken into pieces
- 1 cup hot coffee or tea use decaf if preferred
Instructions
- Fill a medium bowl with ice and water to create an ice bath.
- Place the chocolate in a second medium-sized bowl. Pour the hot coffee or tea over the chocolate and stir until fully melted and smooth.
- Set the bowl with melted chocolate over the ice bath. Whisk vigorously by hand or with a hand mixer for about 5 minutes, until the mixture begins to thicken.
- Once thickened, remove from the ice bath and continue stirring until the mousse reaches a light, fluffy consistency.
- Spoon into pudding cups or serving bowls and enjoy immediately, or refrigerate for up to 4 days.


Leave a Comment