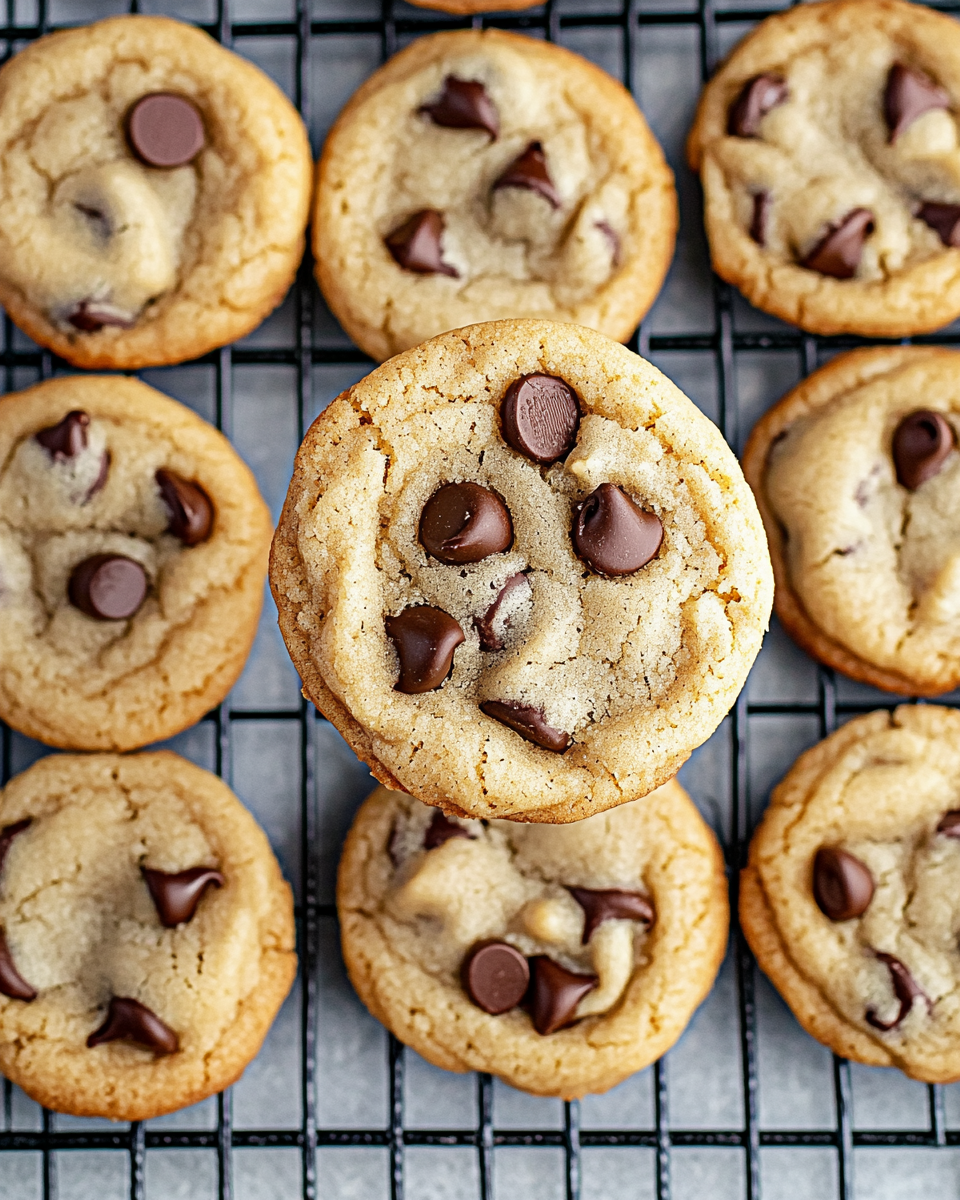
Homemade chocolate chip cookies are a timeless classic, loved for their soft, chewy texture and rich, buttery flavor. This recipe is simple to make, requiring no chilling time, so you can have fresh, warm cookies in under 30 minutes.
Perfect for any occasion, these cookies are great for sharing at gatherings, enjoying as an afternoon treat, or serving alongside a cup of coffee. With the perfect balance of sweetness and chocolatey goodness, this recipe guarantees delicious results every time.
Why You’ll Love This Recipe
- No chilling required – saves time without sacrificing texture.
- Soft and chewy texture – with slightly crisp edges.
- Made with pantry staples – easy ingredients, no fancy tools needed.
- Quick to prepare – ready in about 30 minutes from start to finish.
- Customizable – add nuts, different chocolates, or flavor variations.
Essential Tools and Equipment
Having the right tools ensures your cookies turn out perfectly.
- Mixing Bowls – One for wet ingredients, another for dry ingredients.
- Hand or Stand Mixer – Helps achieve a light, fluffy dough.
- Measuring Cups and Spoons – Ensures accurate ingredient portions.
- Baking Sheets – Provides even heat distribution.
- Parchment Paper or Silicone Baking Mat – Prevents sticking and promotes even baking.
- Wire Rack – Allows cookies to cool properly, maintaining their texture.
Ingredient Breakdown & Substitutions
Each ingredient plays a key role in the texture and flavor of the cookies.
- Butter – Provides richness and a soft texture. Use unsalted butter if preferred, and add an extra pinch of salt.
- Granulated Sugar & Brown Sugar – A mix of both sugars creates the ideal balance of crisp edges and a chewy center. Brown sugar adds moisture and depth of flavor.
- Vanilla Extract – Enhances the overall flavor.
- Eggs – Bind the ingredients together and add moisture.
- All-Purpose Flour – The base of the cookies. Can be substituted with a gluten-free 1:1 baking flour.
- Baking Soda & Baking Powder – Helps the cookies rise and spread properly.
- Sea Salt – Balances the sweetness and enhances flavor.
- Chocolate Chips – Semi-sweet chocolate chips are classic, but you can use dark, milk, or white chocolate as well.
Optional Add-Ins:
- Chopped walnuts or pecans for crunch.
- A sprinkle of sea salt on top for a salted chocolate chip cookie variation.
- Peanut butter or butterscotch chips for a flavor twist.
Step-by-Step Directions
Step 1: Preheat the Oven
- Set the oven to 375°F (190°C).
- Line three baking sheets with parchment paper and set them aside.
Step 2: Mix the Dry Ingredients
- In a medium bowl, whisk together the flour, baking soda, baking powder, and salt.
- Set aside.
Step 3: Cream the Butter and Sugars
- In a large mixing bowl, use a hand mixer or stand mixer to beat softened butter, granulated sugar, and brown sugar until smooth and creamy.
- This should take about 2 minutes on medium speed.
Step 4: Add the Eggs and Vanilla
- Beat in eggs, one at a time, followed by the vanilla extract.
- Mix until the batter is light and fluffy, about 1 minute.
Step 5: Incorporate the Dry Ingredients
- Gradually add the dry ingredients to the wet mixture.
- Mix on low speed until just combined. Do not overmix, as this can result in tough cookies.
Step 6: Fold in the Chocolate Chips
- Stir in chocolate chips until evenly distributed throughout the dough.
Step 7: Shape the Cookies
- Roll 2-3 tablespoons of dough into balls.
- Place them 2 inches apart on the prepared baking sheets to allow space for spreading.
Step 8: Bake the Cookies
- Bake for 8-10 minutes or until the edges just start to turn golden brown.
- The centers should still look slightly underbaked—this ensures a soft, chewy texture.
Step 9: Cool the Cookies
- Let the cookies rest on the baking sheet for 5 minutes before transferring them to a wire rack to cool completely.
- Enjoy warm or store for later.
Serving Suggestions
Homemade chocolate chip cookies are best enjoyed fresh out of the oven when they are still warm, with melted chocolate in every bite. Here are some great ways to serve them:
Classic Pairings
- With a glass of milk – A traditional favorite, perfect for dipping.
- With coffee or tea – The rich flavors of coffee or tea balance the sweetness of the cookies.
- As an ice cream sandwich – Place a scoop of vanilla or chocolate ice cream between two cookies for an indulgent dessert.
- With hot chocolate – Enhances the chocolatey goodness, especially on colder days.
Creative Serving Ideas
- Drizzle with melted chocolate or caramel – Adds an extra layer of richness.
- Crumble over yogurt or oatmeal – Turns a simple breakfast into a treat.
- Make a cookie sundae – Serve with a scoop of ice cream, whipped cream, and a cherry on top.
- Pair with fresh fruit – Berries or banana slices provide a refreshing contrast to the cookies’ sweetness.
Common Mistakes to Avoid & How to Perfect the Recipe
Even simple cookie recipes can go wrong if a few key details are overlooked. Here are the most common mistakes and how to avoid them:
1. Overmixing the Dough
- Mistake: Overmixing develops too much gluten, resulting in tough cookies.
- Solution: Mix the ingredients just until they are combined. Stop as soon as no streaks of flour remain.
2. Using Butter That Is Too Soft or Melted
- Mistake: Overly soft or melted butter makes cookies spread too much, resulting in thin, greasy cookies.
- Solution: Butter should be softened but still slightly cool to the touch. If it feels greasy, refrigerate it for 10-15 minutes before using.
3. Incorrect Flour Measurement
- Mistake: Too much flour makes cookies dry and crumbly, while too little flour causes excessive spreading.
- Solution: Use the spoon and level method—spoon the flour into the measuring cup and level it off with a knife. Avoid scooping directly from the bag.
4. Overbaking the Cookies
- Mistake: Baking until the entire cookie is golden brown results in dry, hard cookies.
- Solution: Remove cookies from the oven when the edges are golden brown but the centers still look slightly underbaked. They will continue to firm up as they cool.
5. Not Allowing the Dough to Rest
- Mistake: Immediately baking the cookies without letting the dough rest can lead to inconsistent textures.
- Solution: If time allows, let the dough sit for 10-15 minutes before baking. This helps the flavors meld and improves texture.
6. Skipping Parchment Paper or a Silicone Mat
- Mistake: Baking directly on an unlined pan can lead to uneven baking and sticking.
- Solution: Always use parchment paper or a silicone baking mat for consistent results and easy removal.
7. Storing Cookies Improperly
- Mistake: Leaving cookies exposed to air makes them hard and stale.
- Solution: Store cookies in an airtight container at room temperature with a slice of bread to retain moisture.
Side Dish Recommendations
Chocolate chip cookies can be enjoyed on their own, but pairing them with complementary flavors makes them even better. Here are eight great side dish ideas:
1. Vanilla Ice Cream
A scoop of creamy vanilla ice cream balances the rich chocolate and adds a cool contrast.
2. Fresh Berries
Strawberries, raspberries, or blueberries provide a tart and refreshing counterbalance to the sweetness of the cookies.
3. Peanut Butter Spread
Spreading peanut butter on a warm cookie enhances the nutty and chocolate flavors, creating a peanut butter cup-inspired treat.
4. Nutella Drizzle
For an extra indulgent twist, drizzle warm Nutella over the cookies. This adds depth to the chocolate flavor.
5. Greek Yogurt with Honey
A bowl of Greek yogurt with a drizzle of honey provides a tangy and slightly sweet pairing that helps balance the richness of the cookies.
6. Espresso or Latte
The bold bitterness of espresso or a foamy latte cuts through the sweetness, making it a perfect drink to pair with cookies.
7. Fruit Salad
A fresh fruit salad with citrus segments, kiwi, and berries adds a bright and refreshing contrast to the cookies’ richness.
8. Caramel Sauce
Dipping or drizzling cookies with warm caramel sauce adds a buttery sweetness that complements the chocolate.
Expert Tips for the Best Cookies
Perfecting chocolate chip cookies comes down to a few key baking techniques. These expert tips will help you achieve the ideal soft, chewy texture every time.
1. Use Room Temperature Ingredients
Cold butter and eggs do not mix well with dry ingredients, leading to uneven dough. Let butter and eggs sit at room temperature for about 30 minutes before using.
2. Measure Ingredients Accurately
Baking is a science, and small measurement errors can affect the final result. Use the spoon-and-level method for flour and a kitchen scale for precision. Too much flour results in dry cookies, while too little can cause excessive spreading.
3. Do Not Overmix the Dough
Once the dry ingredients are added, mix just until combined. Overmixing can lead to dense, tough cookies by over-developing the gluten in the flour.
4. Chill the Dough for Thicker Cookies
Although this recipe does not require chilling, refrigerating the dough for 30 minutes to an hour can help control spreading and enhance flavor. This step is optional but recommended if you prefer thicker cookies.
5. Use High-Quality Chocolate
The type of chocolate used can make a big difference. Semi-sweet chocolate chips are classic, but chopped chocolate bars or dark chocolate chips add a richer flavor.
6. Slightly Underbake for a Chewier Texture
Cookies continue baking after being removed from the oven. Taking them out when the edges are golden brown but the centers still look soft ensures a chewy texture.
7. Use a Cookie Scoop for Even Baking
A cookie scoop ensures uniform size, which helps all cookies bake evenly. Different sizes can also be used to create larger or smaller cookies.
Storage and Reheating Instructions
Proper storage helps maintain the cookies’ soft and chewy texture for days.
Storing at Room Temperature
- Once cooled completely, store cookies in an airtight container at room temperature.
- To keep them soft, place a slice of bread in the container. The cookies will absorb moisture from the bread, preventing them from drying out.
- Best enjoyed within 4-5 days.
Freezing Cookie Dough
- Scoop the cookie dough into balls and place them on a parchment-lined baking sheet.
- Freeze for 1-2 hours until firm, then transfer to a zip-top freezer bag.
- Label with the date and freeze for up to 3 months.
- To bake, place frozen dough balls on a baking sheet and bake as usual, adding 1-2 extra minutes to the baking time.
Freezing Baked Cookies
- Cool cookies completely before freezing.
- Store in an airtight container with parchment paper between layers to prevent sticking.
- Freeze for up to 3 months.
- Thaw at room temperature for about 30 minutes before serving.
Reheating Cookies
- To refresh cookies, microwave for 10-15 seconds for a warm, fresh-baked taste.
- For a crispier texture, heat in a 300°F oven for 5 minutes.
Frequently Asked Questions (FAQs)
Q: Can I make these cookies ahead of time?
Yes, the dough can be made ahead and stored in the refrigerator for up to 3 days or frozen for longer storage.
Q: How do I keep my cookies soft?
Store them in an airtight container with a slice of white bread. The moisture from the bread keeps cookies soft without affecting their flavor.
Q: Can I use dark chocolate instead of semi-sweet chocolate chips?
Absolutely. Dark chocolate creates a richer, slightly less sweet cookie. Milk chocolate can also be used for a sweeter option.
Q: Why did my cookies spread too much?
Possible reasons include:
- Butter was too warm before mixing.
- Too little flour was used.
- The baking sheets were warm from a previous batch.
Chilling the dough for 30 minutes can help control spreading.
Q: Can I make these cookies gluten-free?
Yes. Substitute all-purpose flour with a 1:1 gluten-free baking flour blend. Ensure all other ingredients, such as baking soda and chocolate chips, are gluten-free.
Q: Can I add nuts or other mix-ins?
Yes. Walnuts, pecans, shredded coconut, or toffee bits are great additions. Add about ½ to 1 cup of your chosen mix-in along with the chocolate chips.
Q: Can I double the recipe?
Yes, this recipe doubles well. If making a larger batch, bake in multiple batches to avoid overcrowding the oven, which can cause uneven baking.
Q: Why do my cookies have a cakey texture instead of being chewy?
This usually happens if there is too much flour or too much baking powder. Measuring ingredients correctly and using the spoon-and-level method can prevent this issue.
Conclusion
Homemade chocolate chip cookies are a simple yet satisfying treat that can be made with basic pantry ingredients. This recipe is quick, requires no chilling, and yields soft, chewy cookies packed with rich chocolate flavor.
By following the expert tips, avoiding common mistakes, and storing cookies properly, you can ensure they remain fresh and delicious for days. Whether served warm with a glass of milk, paired with ice cream, or enjoyed on their own, these cookies are a timeless favorite.
Try experimenting with different chocolates, mix-ins, or even alternative flours to customize the recipe to your preference. Enjoy baking and sharing these cookies with family and friends.
Homemade Chocolate Chip Cookies
Ingredients
- 1 cup salted butter softened
- 1 cup granulated sugar
- 1 cup light brown sugar packed
- 2 teaspoons pure vanilla extract
- 2 large eggs
- 3 cups all-purpose flour
- 1 teaspoon baking soda
- ½ teaspoon baking powder
- 1 teaspoon sea salt
- 2 cups chocolate chips 12 oz
Instructions
- Preheat the oven to 375°F. Line three baking sheets with parchment paper and set aside.
- In a medium bowl, whisk together the flour, baking soda, baking powder, and salt. Set aside.
- In a large bowl, cream together the butter and sugars until well combined.
- Beat in the eggs and vanilla extract until the mixture is light and fluffy (about 1 minute).
- Gradually mix in the dry ingredients until fully incorporated.
- Stir in the chocolate chips until evenly distributed.
- Roll 2-3 tablespoons of dough into balls and place them evenly spaced on the prepared baking sheets.
- Bake for 8-10 minutes, until the edges just begin to turn golden brown. The centers should still look slightly underbaked.
- Let the cookies rest on the baking sheet for 5 minutes before transferring them to a wire rack to cool completely.

Leave a Comment