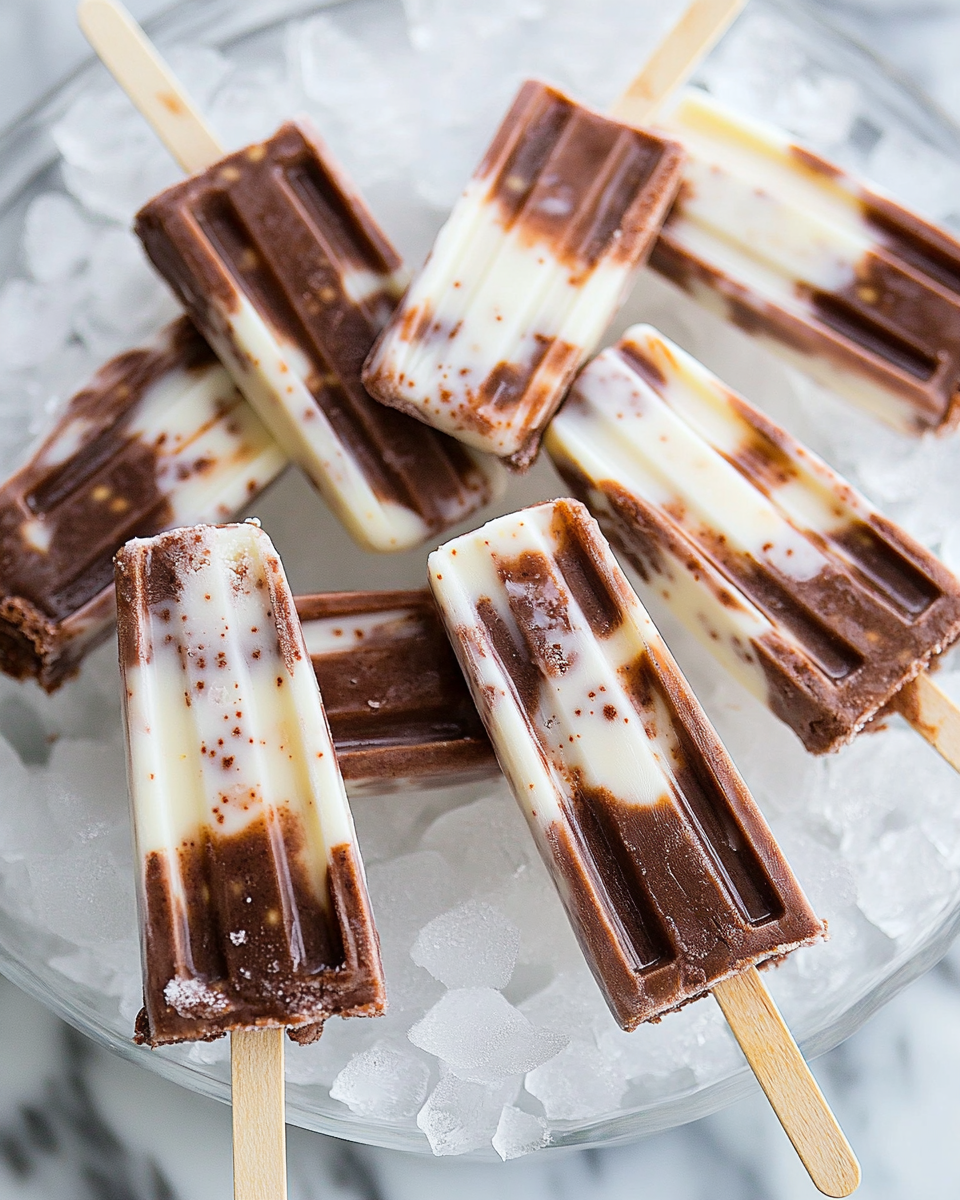
A Nostalgic Frozen Treat You’ll Crave All Summer
Jello Pudding Pops are the ultimate no-bake frozen dessert that instantly brings back childhood memories. Made with instant pudding and whole milk, these creamy popsicles are smooth, rich, and perfectly sweet. The chocolate and white chocolate swirl makes every bite satisfying and fun. Whether you’re looking to cool down on a hot afternoon or need a quick dessert idea for a party, these frozen pudding pops deliver both flavor and convenience.
The beauty of homemade pudding pops lies in their simplicity. With just three ingredients and no cooking required, anyone can make them—no fancy equipment or culinary skills needed. They’re a favorite among kids and adults alike and can easily be customized with mix-ins, layers, or different pudding flavors.
Why You’ll Love These Jello Pudding Pops
- Quick prep: Just mix, swirl, and freeze. Ready in under 15 minutes (plus freezing time).
- No baking: Ideal for hot weather when turning on the oven isn’t an option.
- Creamy texture: Thanks to whole milk and instant pudding, the pops are smooth and satisfying.
- Nostalgic: Inspired by the classic Jell-O brand pops we all remember.
- Fun to make: A great recipe for kids to help with in the kitchen.
- Customizable: Add fruit, cookies, or use flavored milk for unique twists.
Preparation Phase & Essential Tools
Before diving into the mixing, gather the tools you’ll need. Having everything ready will make the process smooth and mess-free.
Required Tools:
- Mixing bowls (2): For mixing the pudding flavors separately.
- Whisk: Ensures a lump-free, creamy texture.
- Measuring cups: Accurate measurement is key for proper consistency.
- Zip-top gallon bag: Helps combine the swirls neatly.
- Scissors: Used to snip the bag’s corner for piping.
- Popsicle molds: The final step—shapes your pudding into frozen treats.
Why These Tools Matter
Using a zip-top bag makes swirling the chocolate and white chocolate layers easy and controlled. A proper whisk guarantees smooth pudding, and using a sturdy mold helps release the pops without breaking them.
Preparation Tips for Perfect Frozen Pudding Pops
- Use cold milk for the best consistency and fastest thickening.
- Don’t overmix—you want the pudding to be thick but pourable.
- Let the pudding rest for a minute or two before piping it into molds.
- Pre-chill your molds if possible to help the pops set faster.
- Don’t overfill the molds to avoid spillover and messy sticks.
Ingredients
Organize all your ingredients before starting:
- 1 (3.3 oz) box White Chocolate Instant Jell-O Pudding Mix
(You can substitute vanilla if preferred) - 1 (3.3 oz) box Chocolate Instant Jell-O Pudding Mix
- 3½ cups cold whole milk, divided evenly (1¾ cups per pudding flavor)
Step-by-Step Directions
1. Mix the Puddings
In two separate mixing bowls:
- Combine the white chocolate pudding mix with 1¾ cups of milk. Whisk until smooth.
- In the second bowl, mix the chocolate pudding mix with the remaining 1¾ cups of milk. Whisk thoroughly.
Let both bowls sit for 2–3 minutes to thicken slightly.
2. Create the Swirl Mixture
- Using a spoon, alternate adding scoops of each pudding flavor into a gallon-sized zip-top bag.
- Seal the bag and gently press the contents toward one corner.
- Snip off a small section of the corner with scissors.
3. Pipe Into Molds
- Carefully pipe the pudding mixture into your popsicle molds.
- Let the colors alternate and swirl naturally as you fill each mold.
- Insert the sticks and tap the molds gently on the counter to eliminate air pockets.
4. Freeze
- Place the molds upright in your freezer.
- Freeze for at least 3 hours, but preferably overnight for best results.
5. Unmold the Pops
- Run the bottom of each mold under warm water for 10–15 seconds.
- Gently pull each pudding pop free—don’t twist, just pull straight.
Best Ways to Serve Jello Pudding Pops
Once your Jello Pudding Pops are fully frozen, the fun begins. Their creamy texture and chocolate-vanilla swirl make them a show-stopping treat all on their own—but a few simple serving enhancements can take them even further.
Creative Serving Ideas
- Serve plain and cold: Sometimes simple is best. Straight from the mold, they’re sweet, creamy, and refreshing.
- Dip in melted chocolate: Quickly dip the frozen pops in melted semi-sweet or white chocolate, then refreeze for a crisp shell.
- Add toppings before freezing: Roll the pops in crushed cookies, sprinkles, or chopped nuts right after filling the molds.
- Serve at events: Arrange on a platter over ice at summer parties, birthdays, or casual get-togethers.
- Drizzle with caramel or fudge: Once removed from molds, a drizzle of sauce adds flavor and presentation value.
Because pudding pops melt slower than ice pops, they’re ideal for outdoor events where other frozen treats might not hold up.
Common Mistakes to Avoid
Even though Jello Pudding Pops are simple to make, a few missteps can affect texture or appearance. Avoid these common mistakes for perfect results every time.
1. Overmixing the Pudding
- Instant pudding only needs to be whisked until smooth.
- Overmixing can make it too thick, making it hard to pipe and swirl properly.
2. Freezing Too Soon
- Allow the pudding to set for 2–3 minutes before transferring to molds.
- Pouring too early can result in watery separation.
3. Overfilling the Molds
- Leave a little room at the top to allow for expansion as the pudding freezes.
- Overfilling can lead to overflow or difficulty inserting sticks.
4. Skipping the Zip-Top Bag
- Piping from a bag gives better control and helps achieve the beautiful swirl effect.
- Spoon-filling often causes blending rather than swirling.
5. Using Low-Fat or Non-Dairy Milk Without Adjustments
- Low-fat or plant-based milks may cause icy or less creamy texture.
- Use full-fat versions or adjust the pudding ratio for better results.
How to Perfect Your Homemade Pudding Pops
These tips help elevate your Jello Pudding Pops from good to unforgettable.
Use Whole Milk or Half-and-Half
- Fat content affects creaminess. Whole milk is ideal, but for an ultra-rich texture, try half-and-half or a mix of the two.
Chill the Molds
- Cold molds help the pudding set faster and more evenly.
Test the Texture Before Filling
- The pudding should be thick enough to hold its shape when piped but still smooth and pourable.
Clean Molds Thoroughly
- Any leftover residue or water in the molds can cause pops to stick or break during removal.
Experiment with Flavors
- Replace chocolate or white chocolate with pistachio, butterscotch, or cookies and cream pudding.
- Layer three flavors for a tricolor frozen treat.
Add Texture with Mix-Ins
- Mini chocolate chips, crushed Oreos, or peanut butter swirls can add flavor and fun.
Side Dishes That Pair Well with Jello Pudding Pops
While Jello Pudding Pops can easily stand on their own, they pair nicely with other light, summer-friendly desserts or drinks. Here are eight great options to serve alongside them:
1. Fresh Fruit Salad
- A cold, juicy fruit medley balances the creamy richness of pudding pops.
2. Grilled Pineapple Skewers
- Warm and caramelized fruit pairs beautifully with frozen desserts.
3. Mint Lemonade
- This refreshing drink enhances the pops’ sweetness with tart citrus and minty contrast.
4. Coconut Water Slush
- A hydrating and naturally sweet beverage to complement the creamy pops.
5. Mini Ice Cream Cones
- Create a fun dessert table with different frozen textures.
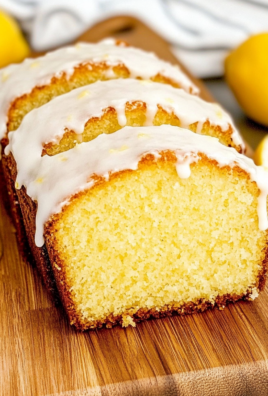
6. Lemon Bars
- Their tangy bite cuts through the sweetness of the pudding pops, offering flavor contrast.
7. Berry Parfaits
- Yogurt, granola, and fresh berries balance the creamy pops with some crunch and freshness.
8. No-Bake Cheesecake Bites
- Bite-sized, creamy treats that pair well in texture and temperature with frozen pudding.
Expert Tips for Better Jello Pudding Pops
Making Jello Pudding Pops is simple, but a few pro tips can help ensure they turn out perfectly every time. These frozen treats are easy to elevate with just a few adjustments and additions.
Flavor Enhancements
- Use flavored milk: Try chocolate milk, almond milk, or strawberry milk for added depth.
- Infuse pudding with extracts: Add a splash of vanilla, coconut, or almond extract to boost flavor.
- Create layered colors: Fill molds in stages to produce distinct, colorful layers with different pudding flavors.
Texture Additions
- Add-ins for crunch: Fold in mini chocolate chips, crushed cookies, or chopped nuts before piping into molds.
- Swirl sauces: Swirl in caramel or peanut butter before freezing for a ripple effect and added richness.
Kid-Friendly Variations
- Let kids choose their own flavors and layer them.
- Use fun-shaped molds to make the dessert more exciting.
- Allow kids to decorate the pops with sprinkles or crushed candy before freezing.
Storage and Freezing Instructions
Jello Pudding Pops store well in the freezer, making them a great make-ahead treat for summer or parties.
Storing the Pops
- Once fully frozen, remove pops from the molds and wrap each one in parchment paper.
- Place the wrapped pops in an airtight freezer-safe container or zip-top freezer bag.
- Store in the coldest section of your freezer.
Shelf Life
- Pops will stay fresh for up to 2 months if properly sealed and stored.
- Avoid exposing them to freezer air to prevent ice crystals or freezer burn.
Re-Freezing
- Once melted, do not refreeze pudding pops. The texture will change and become icy or grainy.
Frequently Asked Questions (FAQs)
Can you freeze pudding to make popsicles?
Yes, instant pudding freezes very well into a creamy, scoopable consistency perfect for popsicles. The added milk and fat content help create a smooth texture that doesn’t become icy like traditional juice-based pops.
What kind of pudding works best for pudding pops?
Instant pudding is the best choice. Cook-and-serve pudding can become too dense or icy after freezing. Instant pudding sets quickly and stays soft and creamy once frozen.
Can I use almond or oat milk instead of whole milk?
Yes, but be cautious. Non-dairy milks can work, but they may result in a less creamy pop. Choose thicker options like barista oat milk or add a stabilizer like a spoonful of dairy-free yogurt to help maintain texture.
How long do Jello Pudding Pops take to freeze?
Freeze for at least 3 hours, but for the best texture and firmness, freeze overnight.
Why are my pudding pops icy?
Icy pops often result from using low-fat milk or water-based milk alternatives. Whole milk or higher-fat options help create a smoother texture.
Do I need popsicle molds?
Not necessarily. If you don’t have molds, small paper cups and wooden sticks make great DIY alternatives. Fill the cups, insert sticks, and freeze as normal. Tear away the cup before serving.
How do I swirl pudding flavors evenly?
Use a zip-top bag to layer both pudding flavors inside, then pipe the mixture into molds. This creates a cleaner, more defined swirl compared to spooning each flavor separately.
Can I make adult versions of pudding pops?
Yes, you can mix in a small amount of coffee liqueur, Irish cream, or other spirits to enhance flavor. Keep in mind this may affect the freezing time and texture.
Are Jello Pudding Pops gluten free?
Most instant puddings are gluten free, but always check the ingredient label for allergens and additives to be sure.
Can I add fruit to pudding pops?
Yes, diced strawberries, raspberries, or bananas can be folded into the pudding before piping. Just ensure the fruit is dry to avoid wateriness in the final product.
Conclusion
Jello Pudding Pops are more than just a dessert—they’re a throwback to simpler times and a perfect way to cool off on warm days. With only three ingredients, customizable flavors, and no oven needed, they’re a favorite for families, summer parties, and spontaneous kitchen fun.
This nostalgic frozen treat can be as simple or as creative as you like. Whether you keep them classic or try flavor twists, homemade pudding pops deliver creamy texture and rich flavor in every bite. Make a batch, freeze ahead, and enjoy a sweet, frozen snack anytime.
Jello Pudding Pops
Ingredients
- 1 3.3 oz box White Chocolate Instant Jell-O Pudding Mix (or vanilla)
- 1 3.3 oz box Chocolate Instant Jell-O Pudding Mix
- 3½ cups whole milk divided
Instructions
- In a medium bowl, whisk the white chocolate pudding mix with 1¾ cups of milk until smooth. Allow it to thicken slightly.
- In a separate bowl, whisk the chocolate pudding mix with the remaining 1¾ cups of milk until smooth. Let it thicken slightly as well.
- Once both pudding mixtures have started to set, spoon alternating scoops of each into a gallon-size zip-top bag. Seal the bag and snip off one corner.
- Pipe the pudding mixture into popsicle molds, letting the two flavors swirl together as you fill them.
- Freeze for at least 3 hours, or overnight for best results.
- To remove the pudding pops, dip the bottoms of the molds in hot water for a few seconds until the pops slide out easily.
Leave a Comment