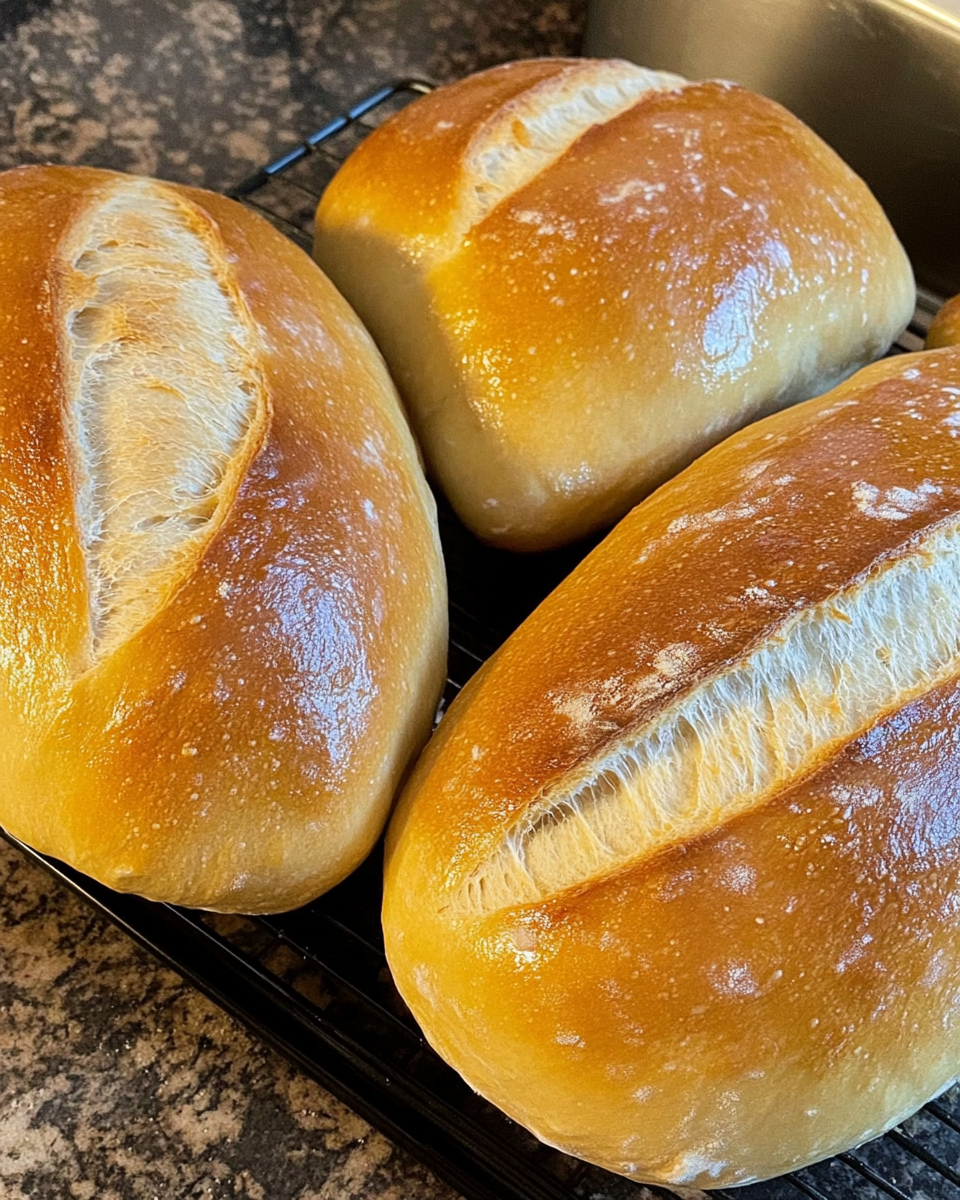
Soft sourdough sandwich bread combines the rich flavor of traditional sourdough with a tender, pillowy texture perfect for sandwiches, toast, or even French toast. Unlike rustic sourdough loaves with a thick, chewy crust, this recipe produces a soft, golden crust and light crumb, ideal for everyday use. The beauty of this recipe lies in its simplicity — no intricate shaping, stretching, or folding techniques required.
Whether you’re a seasoned sourdough baker or just starting out, this recipe is approachable and flexible. Its 24-hour timeline fits into busy schedules, requiring only about 10 minutes of hands-on work. You’ll achieve beautifully soft sandwich loaves with the signature tangy sourdough flavor, perfect for everything from deli sandwiches to hearty breakfast toast.
Why This Recipe Works
- Requires minimal hands-on time.
- Produces soft, tender loaves perfect for sandwiches.
- Flexible schedule fits into busy lifestyles.
- No need for complex folding or shaping.
- Versatile enough for honey wheat, white, or enriched versions.
Essential Tools and Equipment
- Stand Mixer with Dough Hook: Saves time and effort during mixing and kneading.
- Mixing Bowls: Large enough for bulk fermentation.
- Loaf Pans: Standard 9×5-inch pans work best.
- Bread Lame or Sharp Knife: For scoring loaves.
- Thermometer: Ensures accurate baking and fermentation temperatures.
- Plastic Wrap or Reusable Covers: Helps prevent dough from drying out.
- Dough Scraper: Useful for handling and dividing dough.
- Cooling Rack: Ensures even cooling post-bake.
Preparation Tips for Success
- Use Active Starter: Ensure your sourdough starter is bubbly and doubles within 4 to 6 hours after feeding.
- Monitor Hydration: Depending on the flour you use, you may need to adjust liquid amounts slightly to achieve a soft, slightly sticky dough.
- Temperature Control: In cooler kitchens, use warm milk and allow longer fermentation times. In warmer environments, monitor closely to prevent over-proofing.
- Weigh Ingredients: For consistent results, weighing flour and liquids can help achieve the right dough consistency.
Ingredients List
For the Pre-ferment
- 2 cups active sourdough starter
- 2 cups water, milk, or buttermilk (warm if the room is cool)
- 3 cups all-purpose flour or bread flour
For the Dough
- ¼ cup fat (butter, oil, melted coconut oil, or beef tallow)
- ½ cup sweetener (honey or sugar)
- 4 teaspoons salt
- 3 cups milk or buttermilk (warm if needed)
- 9 to 11 cups all-purpose flour or bread flour
Step-by-Step Directions
Step 1: Feed the Starter
Feed your sourdough starter with no more than ½ cup starter, 2 cups flour, and about 1⅓ cups warm water. Let it sit at room temperature until bubbly and active. This ensures strong fermentation in your bread.
Step 2: Prepare the Pre-ferment
In the bowl of a stand mixer, combine 2 cups milk, 2 cups active sourdough starter, and 3 cups flour. Mix on low speed for 1 minute with the dough hook. Cover and leave to ferment at room temperature overnight.
Step 3: Mix the Dough
The next morning, add the fat, sweetener, salt, and 3 cups milk or buttermilk to the pre-ferment. Mix on low speed until roughly combined. Add 5 cups flour and mix on medium speed for 5 to 10 minutes to build gluten. Gradually add 4 to 6 more cups of flour, until the dough pulls away from the sides of the bowl and feels slightly sticky. Continue mixing for 2 to 3 more minutes.
Step 4: First Rise
Transfer the dough to a large oiled bowl. Cover with plastic wrap or a towel and allow to rise in a warm spot for 2 to 3 hours until doubled. This may take longer in cooler kitchens.
Step 5: Shape the Loaves
Punch down the dough and transfer to a lightly floured surface. Divide into 4 equal portions. Flatten each portion into a rectangle, fold the edges inward, and roll into a loaf shape. Place each loaf into a greased loaf pan.
Step 6: Second Rise
Cover the pans and allow loaves to rise until they rise just above the pan edges, about 2 to 3 hours. Avoid over-proofing, which could weaken the structure.
Step 7: Bake
Preheat the oven to 375°F. Score the tops of the loaves with a sharp blade. Bake for about 30 minutes or until the internal temperature reaches 190°F.
Step 8: Cool and Store
Remove loaves from the pans and place on a wire rack. Brush the tops with butter for a soft crust. Allow to cool completely before slicing. Store at room temperature for up to 1 week or freeze for up to 3 months.
Serving Suggestions
Soft sourdough sandwich bread is one of the most versatile homemade breads you can make. Its mild tang, soft crumb, and tender crust make it the perfect base for a wide range of meals. Whether you’re using it for breakfast, lunch, dinner, or even dessert, this bread complements both sweet and savory toppings.
- Classic Deli Sandwiches: Use this bread for hearty sandwiches stacked with meats, cheeses, and vegetables. The soft texture holds fillings well without falling apart.
- Grilled Cheese Sandwiches: A soft loaf with just a hint of sourdough tang enhances melted cheese. Add tomato slices or bacon for extra flavor.
- Breakfast Toast: Spread butter, jam, or avocado on thick slices for a quick, satisfying breakfast. The bread toasts evenly, developing a light golden crust.
- French Toast: Slightly stale slices absorb egg mixture beautifully, making this bread ideal for soft, custardy French toast.
- Open-Faced Tartines: Top toasted slices with ricotta, fresh vegetables, smoked salmon, or seasonal fruit for easy lunches or snacks.
- Croutons and Breadcrumbs: Leftover slices can be cubed and toasted into sourdough croutons or ground into homemade breadcrumbs.
- Panini and Pressed Sandwiches: This bread holds up well under a panini press, creating crisp yet tender sandwiches.
- Soup Pairing: A slice of buttered sourdough sandwich bread is the perfect side for hearty soups like tomato, butternut squash, or beef stew.
Common Mistakes to Avoid and How to Perfect the Recipe
Even with a forgiving recipe like this, small mistakes can affect your final loaves. Here are common errors bakers encounter and how to avoid them.
Over-proofing the Dough
Letting the dough rise too long can weaken the gluten structure, causing the bread to collapse either in the oven or after baking. Monitor your dough closely, especially in warmer kitchens, and bake when the loaves are just cresting the pan edges.
Under-developed Gluten
This bread relies on strong gluten development to achieve its soft, slightly chewy texture. Mixing too briefly or skipping kneading results in dense, uneven crumb. Use the windowpane test — stretch a small piece of dough between your fingers. If it forms a thin, translucent membrane, the gluten is ready.
Adding Too Much Flour
Soft sandwich loaves need hydrated dough. If you add too much flour, the bread becomes dry and dense. Stop adding flour when the dough is just pulling away from the sides of the bowl, even if it still feels a bit sticky.
Inactive Starter
A sluggish sourdough starter produces flat, dense bread. Make sure your sourdough starter is consistently doubling within 4 to 6 hours after feeding. If not, build it up with a few consecutive feedings before baking.
Skipping Temperature Adjustments
In cooler kitchens, use warm liquids and extend fermentation and proofing times. In hot environments, shorten proofing times to prevent over-proofing. Temperature impacts both the rise and final texture.
Poor Shaping Techniques
Properly shaping the dough into a tight loaf prevents large air pockets and uneven baking. Flatten each portion into a rectangle, fold in the edges, and roll tightly to create surface tension.
Baking at the Wrong Temperature
An oven that’s too cool can leave your bread underbaked with a gummy interior. Too hot, and the crust hardens before the loaf finishes baking. Use an oven thermometer to ensure accurate baking temperatures.
Slicing Too Soon
Cutting into warm bread compresses the crumb and releases steam, leading to gummy slices. Always let the loaves cool completely before slicing for the best texture.
Side Dish Recommendations
A loaf of soft sourdough sandwich bread can transform simple meals into comforting, satisfying plates. Here are eight perfect side dishes to pair with your homemade bread.
- Creamy Tomato Soup
The tangy, velvety texture of tomato soup is the ideal match for buttery slices of soft sourdough. - Chicken Salad
Serve soft sourdough with a creamy chicken salad, either as a sandwich or alongside for dipping. - Garlic Butter Green Beans
Crunchy green beans tossed with garlic butter contrast beautifully with soft, chewy bread. - Broccoli Cheddar Soup
The creamy, cheesy soup pairs perfectly with toasted slices for dipping. - Mediterranean Hummus Platter
Thick slices of sourdough work well with hummus, olives, cucumber, and feta for a simple Mediterranean spread. - Caprese Salad
Juicy tomatoes, fresh basil, and mozzarella are even better when paired with sourdough toast or a sandwich version with balsamic glaze. - Roasted Red Pepper Spread
Smooth roasted red pepper and cream cheese spread layered on sourdough is a fantastic snack or appetizer. - Cucumber Yogurt Salad
Light and tangy cucumber yogurt salad offers a cooling balance to buttery, slightly tangy sourdough slices.
Recipe Tips for Soft Sourdough Sandwich Bread
Achieving soft, fluffy sourdough sandwich bread relies on a few essential techniques. These tips help ensure your loaves have the perfect rise, texture, and flavor.
- Use a strong, active starter
The success of your bread depends heavily on the health of your sourdough starter. If your starter takes longer than 6 hours to double after feeding, refresh it for a day or two before baking. - Hydration matters
This dough should feel slightly sticky but not unmanageable. If it feels dry, add a tablespoon of milk at a time until you achieve the right consistency. Over-floured dough will produce dense, dry bread. - Control fermentation temperature
Dough rises best at temperatures between 70°F and 75°F. Cooler environments require longer fermentation, while warmer kitchens speed it up. If necessary, use a proofing box or the oven with the light on to maintain optimal temperature. - Mix thoroughly for gluten development
This recipe relies on proper gluten formation to support the final structure. Knead until the dough passes the windowpane test, meaning you can stretch a piece thin enough to see light through it. - Brush the crust
To maintain soft crusts, brush the loaves with melted butter immediately after baking. This prevents the crust from becoming too thick or chewy. - Allow full cooling
Cooling loaves fully before slicing helps the crumb set and prevents gumminess. Resist the urge to cut into warm bread. - Customize flavors
Substitute honey for sugar for a softer, more tender crumb with a slightly richer flavor. Swap buttermilk for milk if you want a tangier finish. - Freezer-friendly
Slice and freeze loaves for convenient meal prep. Individual slices can be thawed or toasted directly from the freezer.
Storage and Reheating Instructions
Homemade sourdough sandwich bread has excellent shelf life thanks to the natural fermentation process. Follow these storage tips to maintain freshness.
- Room temperature storage
Store loaves in plastic bags, beeswax wraps, or airtight containers at room temperature for up to 1 week. Avoid storing bread in the refrigerator, which dries out the crumb. - Freezing instructions
For longer storage, slice loaves and place them in freezer-safe bags. Bread freezes well for up to 3 months. To prevent freezer burn, remove as much air as possible from the bag. - Reheating options
For soft slices, thaw at room temperature or in the microwave for 10-15 seconds. For toast, place slices directly in the toaster from frozen.
Frequently Asked Questions
Can I use whole wheat flour?
Yes, but it will affect the texture. Whole wheat absorbs more liquid and produces a denser loaf. For the softest bread, use no more than 50% whole wheat flour and increase the hydration slightly.
What if my sourdough starter is weak?
If your starter is sluggish, feed it every 8 to 12 hours for a full day or two before baking. Use warm water and high-quality unbleached flour to encourage stronger fermentation.
How do I know if my dough is proofed correctly?
During the second rise, the dough should rise just above the edges of the pan. Gently press the dough with your fingertip — if the indentation slowly springs back, it is ready to bake. If it springs back immediately, it needs more time.
Can I make this recipe without a stand mixer?
Yes, but mixing and kneading by hand will require about 10 to 15 minutes of effort to achieve proper gluten development. Stretch and fold techniques can also be used to build strength over time.
How do I avoid dense or gummy bread?
Dense bread can result from adding too much flour, under-kneading, or cutting the bread before it fully cools. Gummy bread is often caused by underbaking or slicing too soon.
Can I add seeds, nuts, or dried fruit?
Absolutely. Add up to ½ cup of seeds, nuts, or dried fruit after mixing the dough. Incorporate them evenly to avoid uneven pockets.
What if I want smaller loaves?
You can divide the dough into 6 smaller loaves instead of 4 standard loaves. Adjust baking time to around 22 to 25 minutes for smaller loaves.
Can I use different fats?
Yes. Butter, olive oil, coconut oil, and even beef tallow all work. Each fat adds a slightly different flavor and texture to the finished loaf.
How do I prevent a thick crust?
Brushing the loaves with melted butter right after baking helps keep the crust tender. You can also cover the cooling loaves with a kitchen towel to trap steam and soften the crust further.
Can I bake these in a pullman pan for square sandwich bread?
Yes. This dough works well in pullman pans. Grease the pan well, and bake with the lid on for 25 to 30 minutes for perfectly square sandwich loaves.
Conclusion
Soft sourdough sandwich bread offers the best of both worlds — the rich, complex flavor of naturally fermented sourdough and the tender, fluffy texture of classic sandwich bread. Whether you’re making a loaded deli sandwich, crisp French toast, or simply toasting a slice with butter, this bread adapts to every meal. With flexible timing, minimal hands-on effort, and simple techniques, this recipe is ideal for both beginner bakers and experienced sourdough enthusiasts.
By following these tips and techniques, you’ll achieve reliable, bakery-quality loaves every time. Once you master the base recipe, experiment with mix-ins, flours, or shapes to make it your own. However you enjoy it, homemade soft sourdough sandwich bread elevates everyday meals with its irresistible flavor and texture.
Soft Sourdough Sandwich Bread
Ingredients
For the Pre-ferment:
- 2 cups active sourdough starter
- 2 cups water milk, or buttermilk (warm if your house is cool)
- 3 cups all-purpose or bread flour
For the Dough:
- 1/4 cup fat butter, oil, melted coconut oil, or beef tallow; warm if the house is cool
- 1/2 cup sweetener honey or sugar
- 4 teaspoons salt
- 3 cups milk or buttermilk any kind; warm if the house is cool
- 9 –11 cups all-purpose or bread flour
Instructions
Feed Sourdough Starter
- Feed your sourdough starter with no more than 1/2 cup starter, 2 cups flour, and about 1 1/3 cups warm water.
- Let it sit at room temperature until active and bubbly, then proceed.
Combine Pre-ferment Ingredients
- In the bowl of a stand mixer, combine 2 cups milk or buttermilk, 2 cups active sourdough starter, and 3 cups flour.
- Mix on low speed for 1 minute using the dough hook.
- Cover and let ferment at room temperature overnight.
Mix the Dough
- The next morning, add the fat, sweetener, salt, and 3 cups milk or buttermilk to the pre-ferment.
- Mix on low speed until roughly combined.
- Add 5 cups of flour and mix on medium speed for 5–10 minutes to build gluten.
- Gradually add 4–6 more cups of flour, until the dough pulls away from the sides of the bowl and feels slightly sticky.
- Continue mixing for 2–3 minutes more.
First Rise
- Transfer dough to a large oiled bowl. Cover with a towel or plastic wrap and let rise in a warm spot for 2–3 hours, until doubled. In cooler temperatures, this may take longer.
Shape the Loaves
- Punch down the risen dough and transfer to a lightly floured surface.
- Divide into 4 equal portions.
- Flatten each into a rectangle, fold the corners in to form a triangle, and roll into a loaf shape, tucking the edges under.
- Place each loaf into a greased loaf pan.
Second Rise
- Cover loaves and allow to rise until just above the edges of the pans, about 2–3 hours. Monitor closely to avoid over-proofing.
Bake
- Preheat oven to 375°F (190°C).
- Use a bread lame or sharp blade to slash the tops of the loaves.
- Bake for about 30 minutes, or until the internal temperature reaches 190°F (88°C).
Cool and Store
- Remove loaves from pans and cool on a wire rack.
- Brush tops with butter to keep the crust soft.
- Allow loaves to cool completely before slicing.
- Store at room temperature for up to 1 week in a plastic bag, or freeze (pre-sliced if desired) for up to 3 months.


Leave a Comment